PackerでQemuのUbuntuイメージを作る話
Posted on 2014/03/03(Mon) 03:45 in technical
概要
PackerとKVM(qemu)を使って、OSの自動インストールをします。 インストール対象はUbuntu 12.04.3 LTSを使いますので、自動化にはPreseedも使います。
Packerのインストール
ダウンロードしてきて好きなところにぶちまけるだけの簡単なお仕事です。
Packer Downloads : http://www.packer.io/downloads
今回はLinuxを使うので、zipをダウンロードして適当な場所に置きます。
こんな感じですかね。:
$ cd
$ mkdir vm
$ cd vm
$ wget https://dl.bintray.com/mitchellh/packer/0.5.2_linux_amd64.zip
$ unzip 0.5.2_linux_amd64.zip
警告
unzip入ってなかったら apt-get install unzip しましょう...
自動インストール用のファイル作成
本来はここが一番つらくてしんどい行程なのですが、とりあえずお料理番組ばりに冷蔵庫(github)から取得してきましょう。
https://github.com/ainoniwa/packer-templates/archive/f2b38b99a999581a26bc70a631ab0f0c27944b75.zip
こんな感じですかね。:
$ wget https://github.com/ainoniwa/packer-templates/archive/f2b38b99a999581a26bc70a631ab0f0c27944b75.zip
$ unzip f2b38b99a999581a26bc70a631ab0f0c27944b75.zip
OSのインストールイメージの取得
適当なところからダウンロードしましょう。理研さんとかが良いですかね。:
$ cd packer-templates-master/ubuntu1204
$ wget http://ftp.riken.go.jp/Linux/ubuntu-iso/CDs/12.04.3/ubuntu-12.04.3-server-amd64.iso
で、packer-templatesの中のubuntu1204フォルダの中に置きます。これは単に僕の独自ルールです。
通報
Packerはインストールイメージの検証を行うので、MD5SUMSまたはSHA1SUMSもダウンロードしておくと良いです。 もしこの記事に従ってainoniwa/packer-templatesを使う場合は、恐らく気にしなくても使えるんじゃないかと思います。
フォルダ構造とファイル群
今回はこんな感じにしました:
+ vm
    - packer.exe
    + packer-templates-master
        + ubuntu1204
            - ubuntu-12.04.3-server-amd64.iso
            - ubuntu1204_3_qemu.json
- ubuntu-12.04.3-server-amd64.iso : さっきダウンロードしてきたUbuntuのCDイメージ
- ubuntu1204_3_qemu.json : Packerの構成ファイル
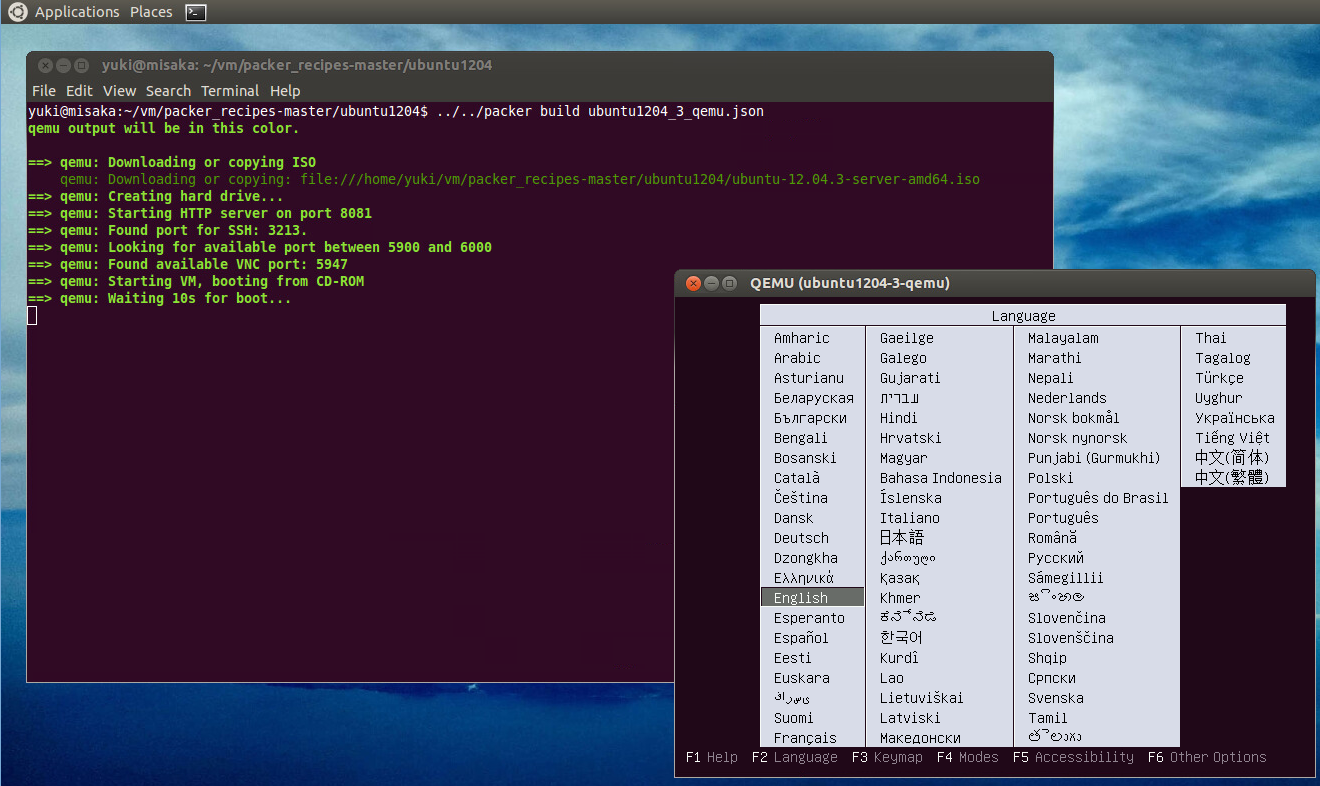
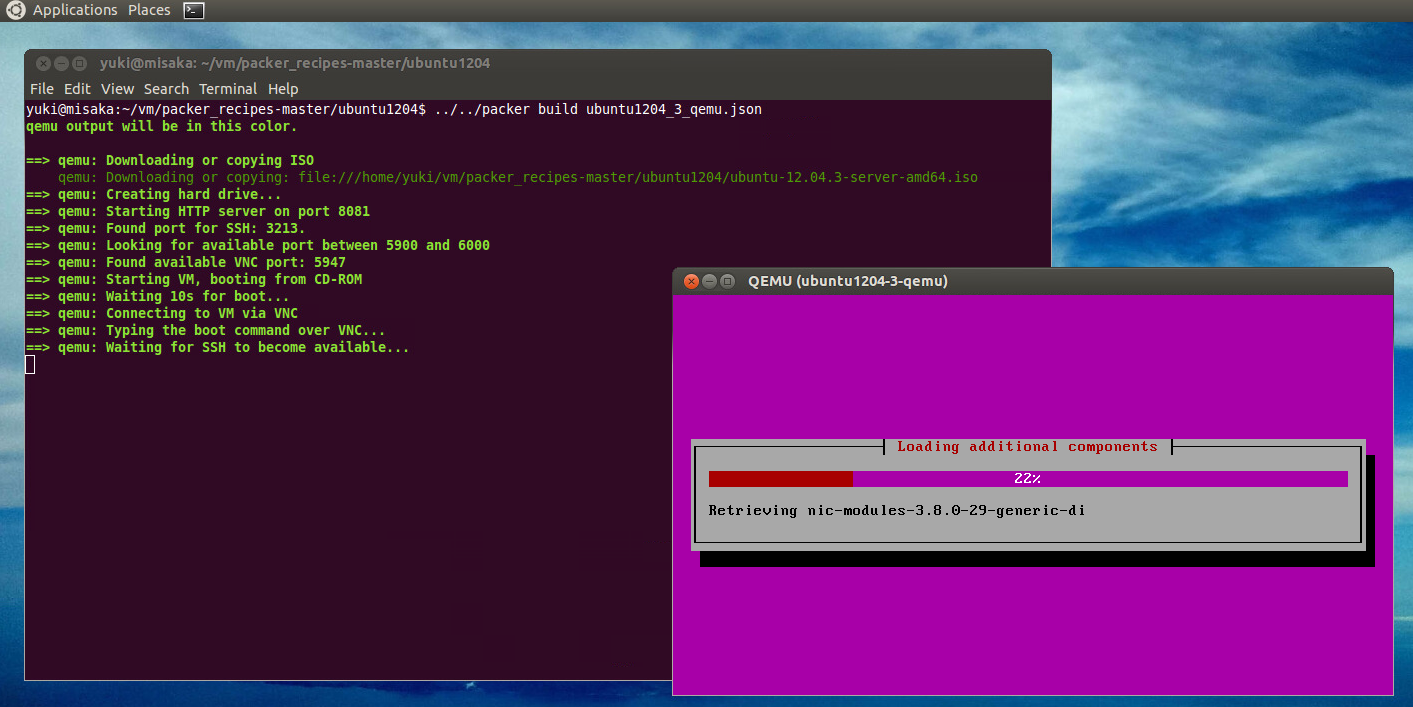
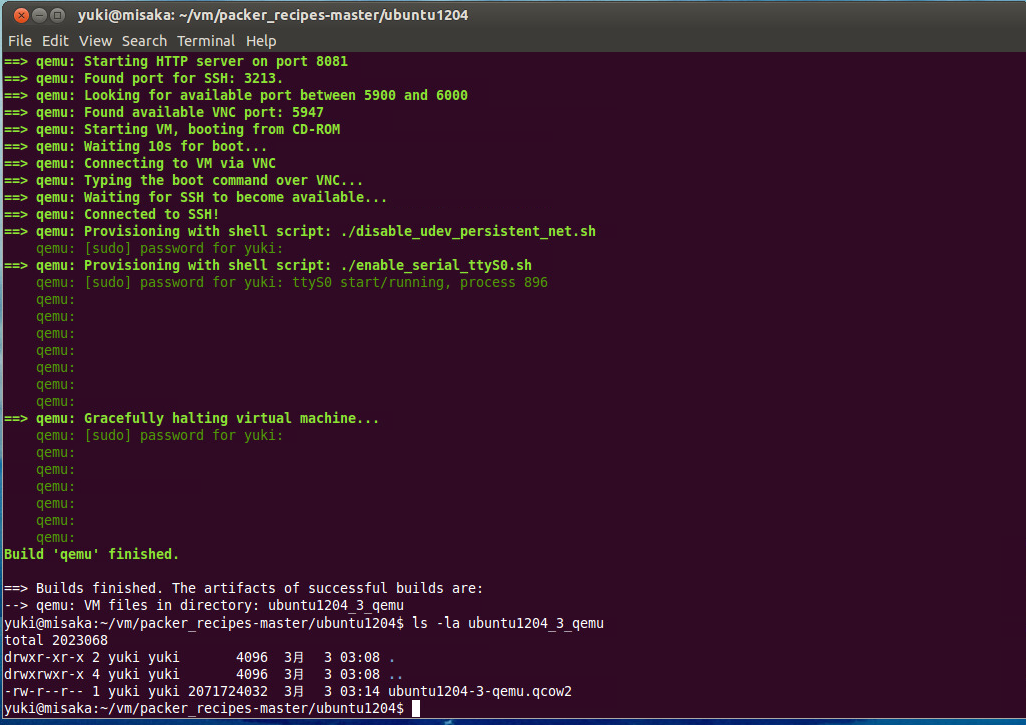
自動インストール
Linuxはコマンドの方が簡単なので、レッツpackerコマンドを叩きます。:
$ ../../packer build ubuntu1204_3_qemu.json
うにょうにょインストールされていく。
はいできあがり。
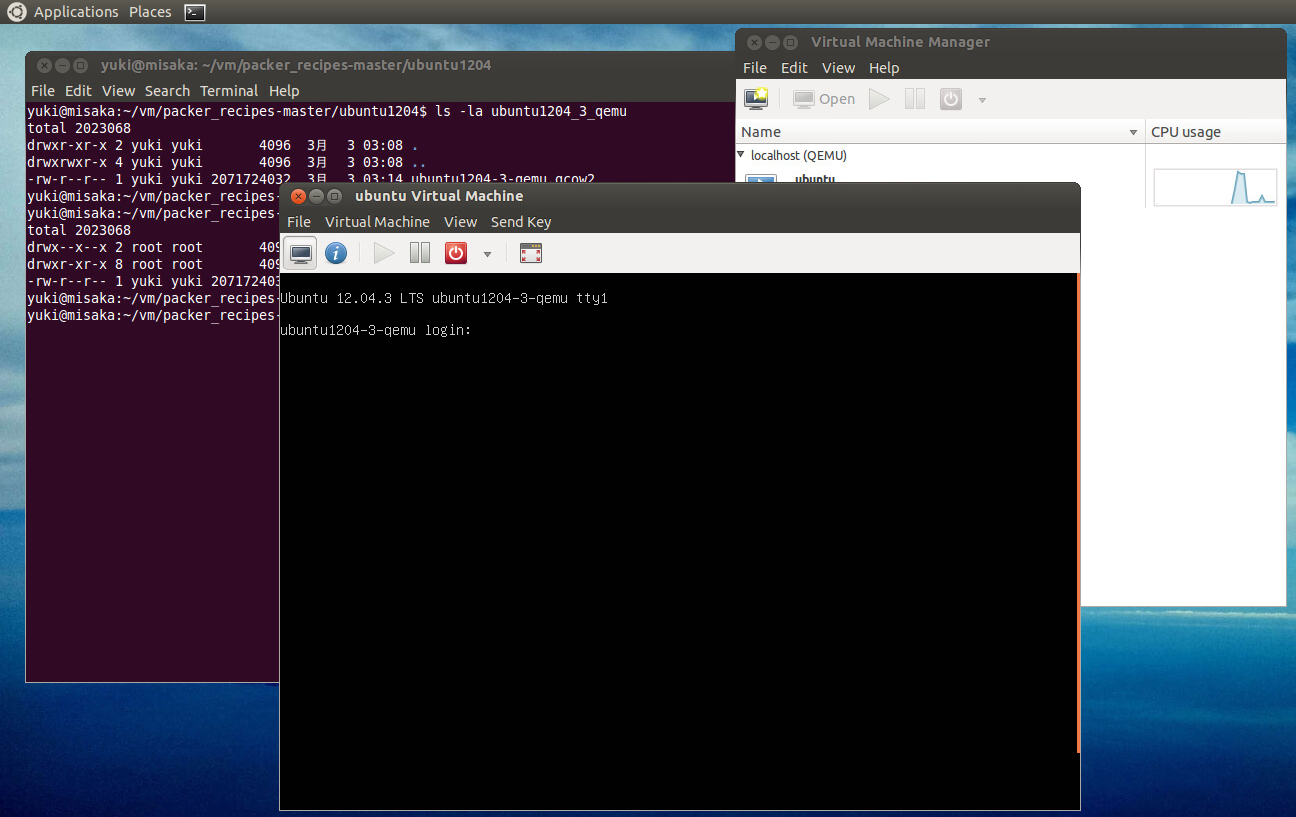
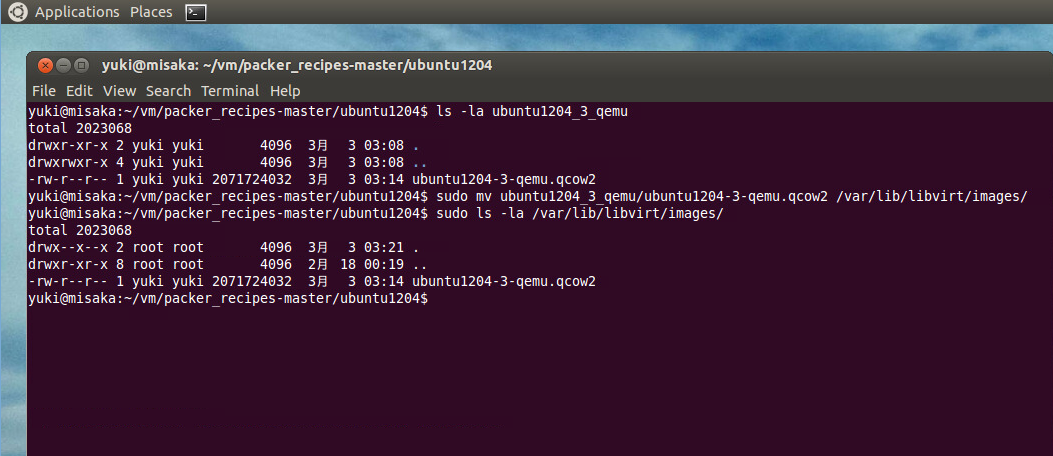
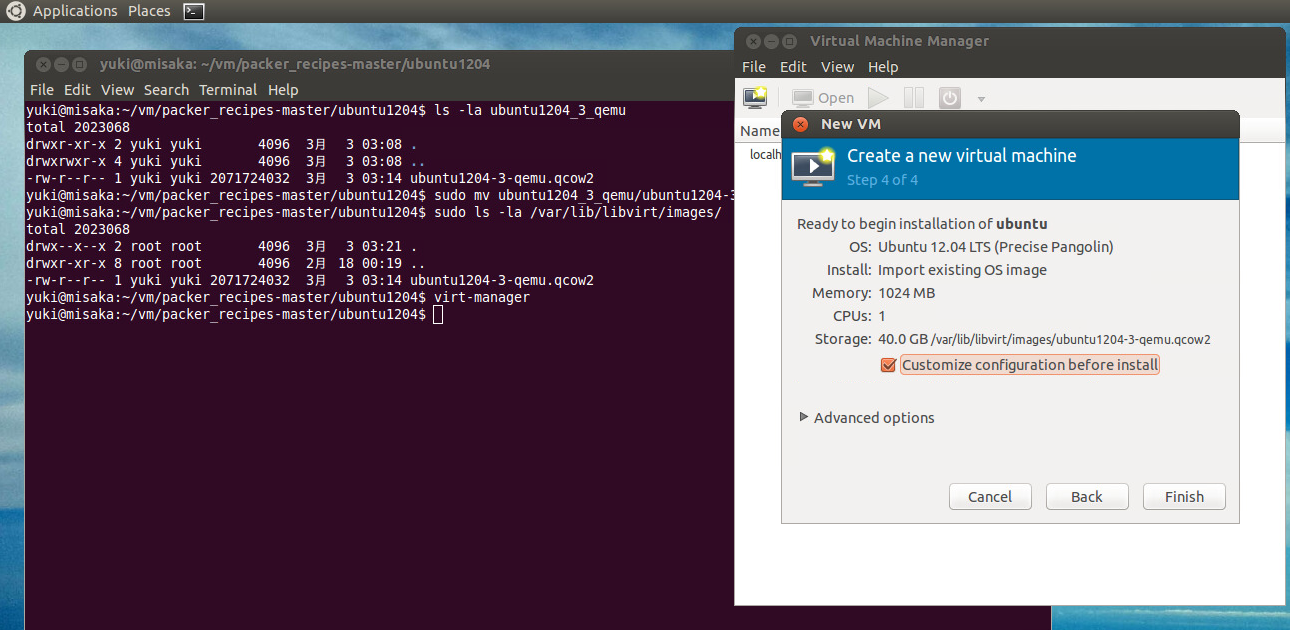
で、こいつをlibvirtで使ってるディレクトリに放り込む。
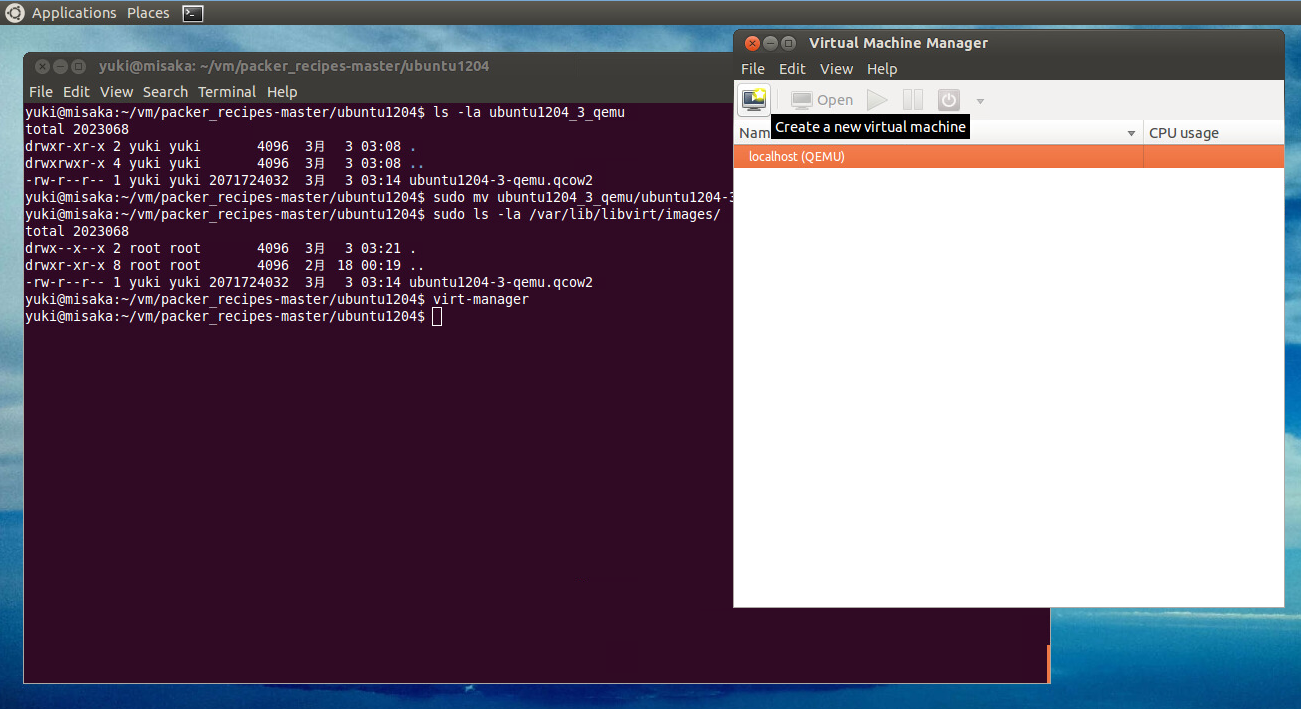
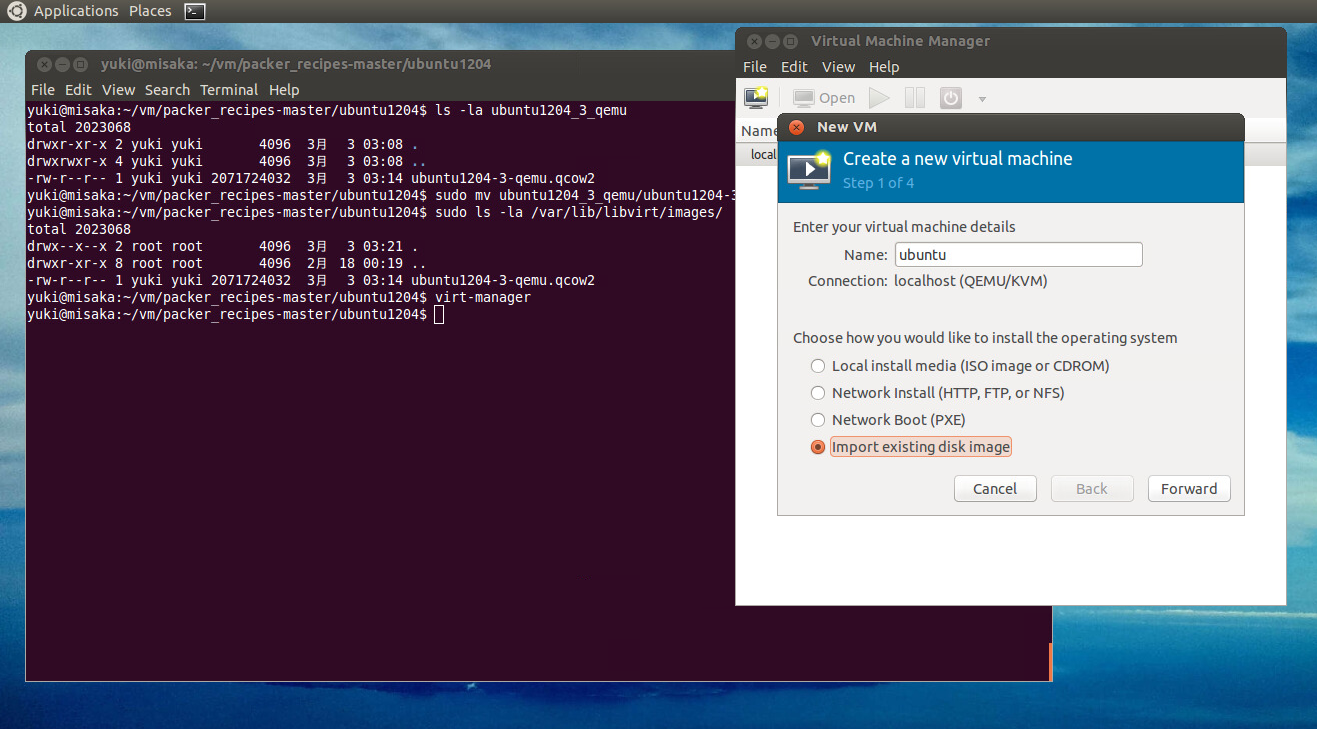
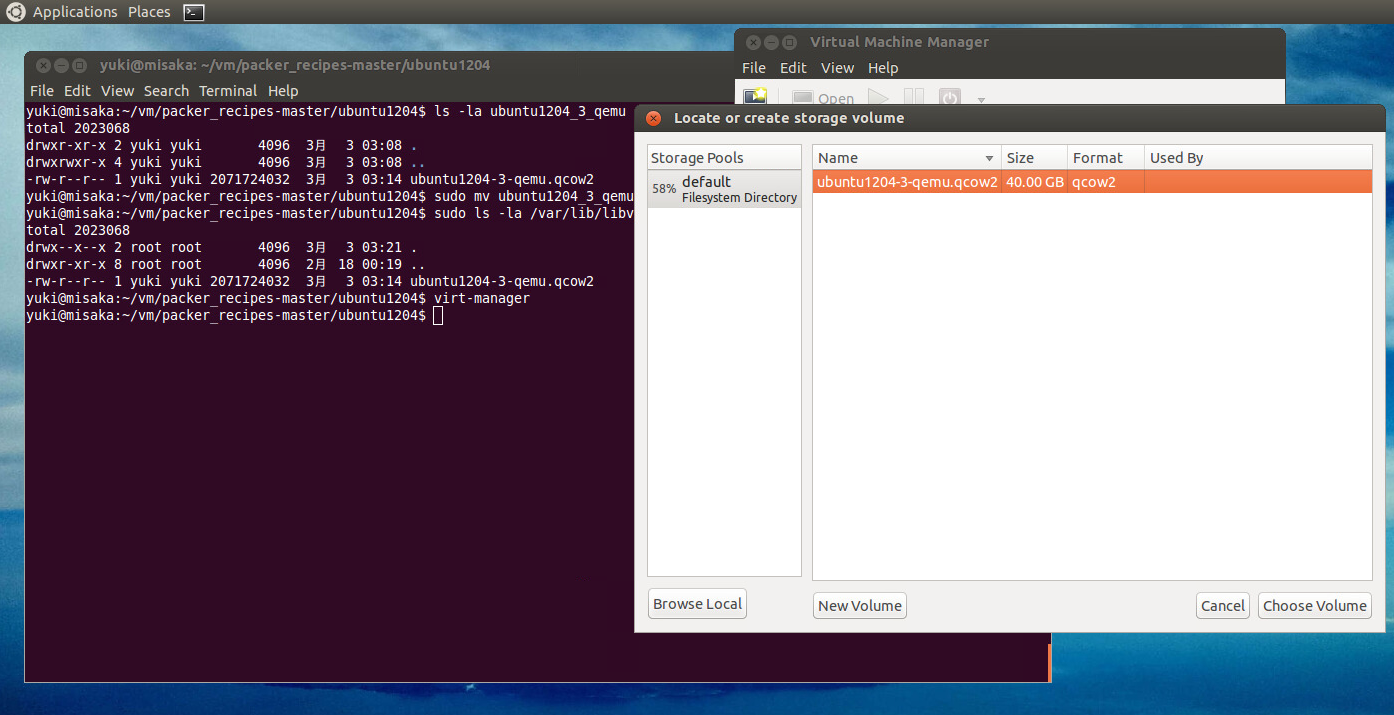
あとは、virt-managerから既存イメージを指定して仮想マシンを作る。
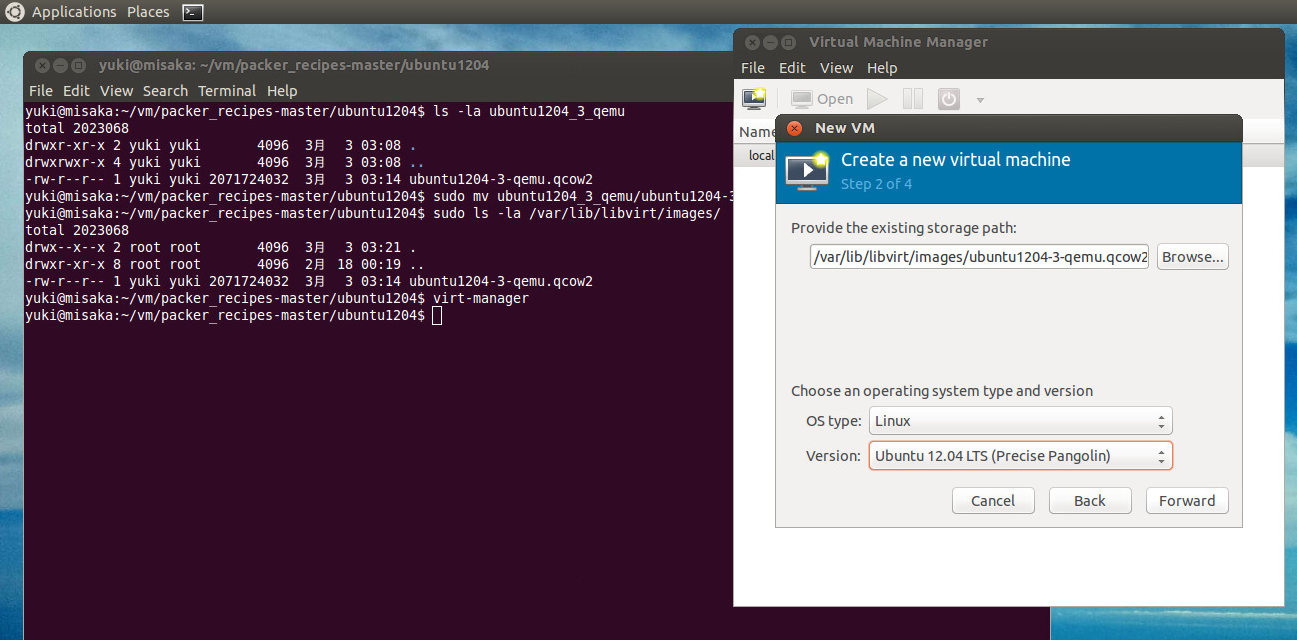
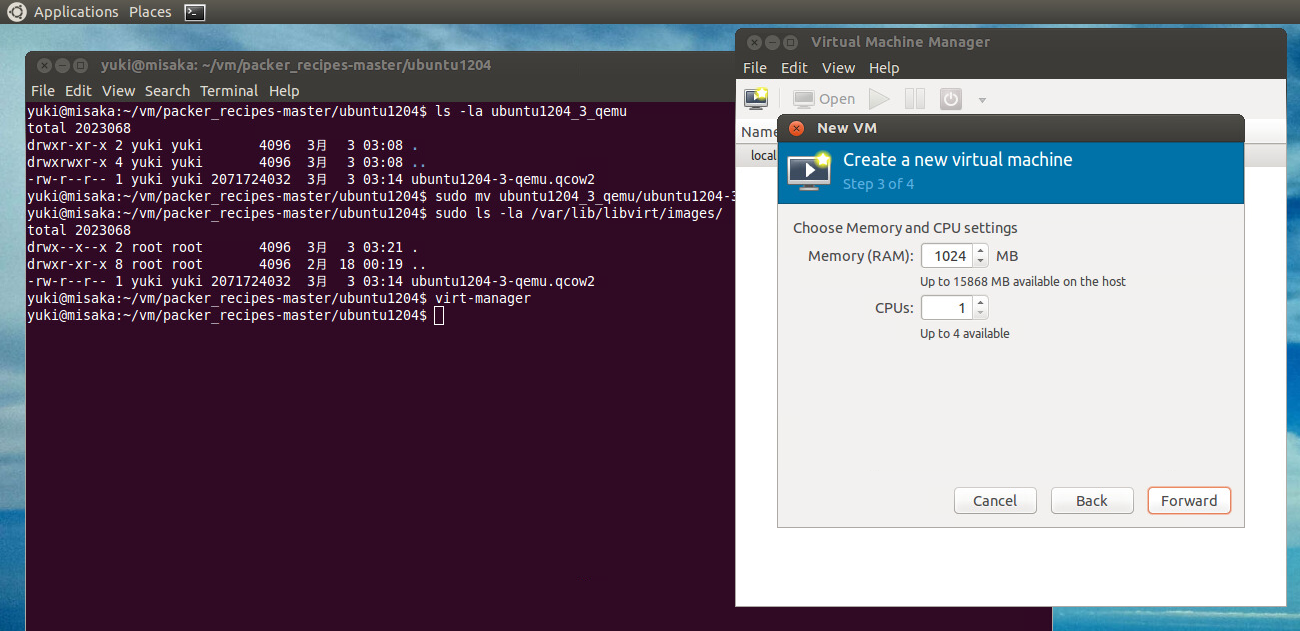
普通に起動するとGUIも使えないから、ディスプレイをvgaにしておきたいので、起動前に仮想マシンの編集にチェック。

通報
もちろん、デフォルトだとNATに繋がってるから、arp -nしてそれっぽく増えてるIPにsshすれば、別に問題にはならないね。
はい、出来上がり。お疲れ様でした。